
Buyer Background
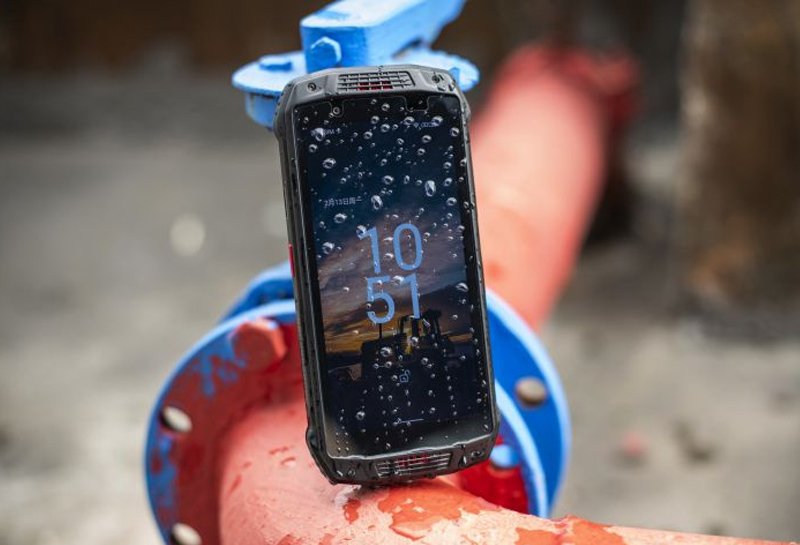
The project involved a rugged handheld enclosure where waterproofing had to be achieved within a thin, space constrained housing. The product architecture was similar to handheld terminals, industrial tablets, and PDA-type devices, where overall thickness, enclosure appearance, and internal packaging leave little room for a conventional sealing structure.
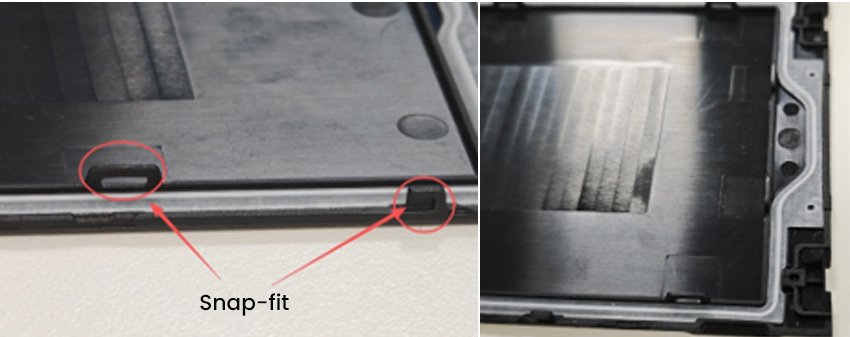
The main housing and upper cover were assembled primarily through snap-fit locking rather than relying on a dense screw pattern. This made assembly more convenient, but it also reduced the amount of uniform clamping force available around the sealing perimeter. At the same time, the enclosure had an IP67 waterproofing target, so the sealing system had to work reliably even with limited compression space and an irregular housing outline.
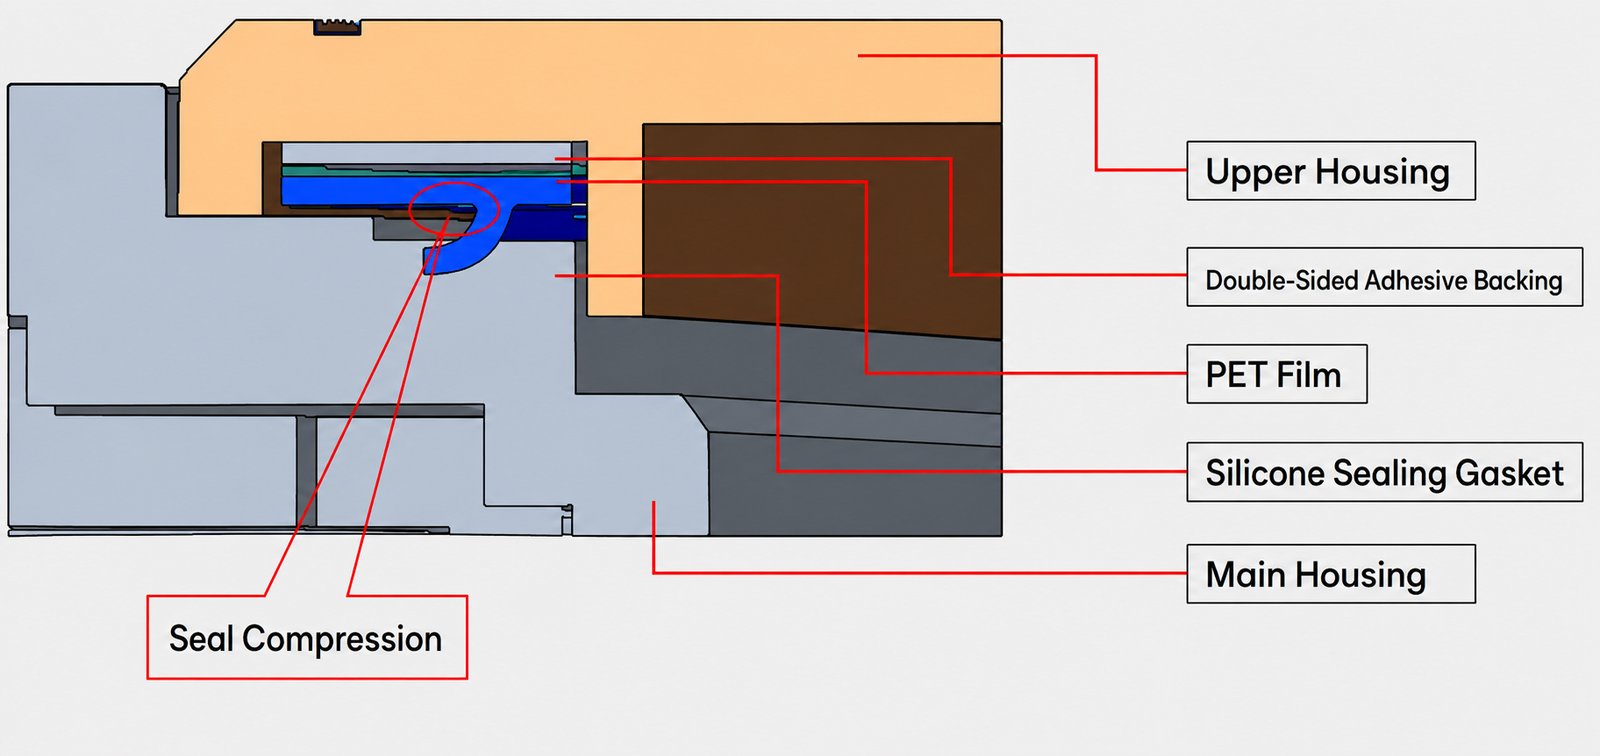
The sealing assembly consisted of the below elements:
- Main housing: the primary structural support of the device.
- Custom one-piece profile silicone rubber gasket: the main waterproof sealing component.
- PET carrier film with double-sided adhesive: used to pre-position and stabilize the soft gasket before final assembly.
- Upper housing: the locking component that applies the required compression to the gasket.
This was not a case where an off-the-shelf O-ring could simply be selected by diameter. The seal had to be developed around the enclosure structure itself.
Pain Point
The first challenge was the limited space available for the seal groove.
A traditional O-ring or rectangular compression gasket normally needs sufficient axial or radial groove depth to generate a stable sealing load. In this device, however, the housing wall had already been reduced to meet the product’s thickness target. Making the groove deeper would consume valuable space and could weaken the housing structure.
The second challenge was uneven compression around corners.
Because the upper and lower housings were joined by snap-fit features, the clamping force was not distributed as evenly as it would be with multiple screws. The rectangular enclosure geometry made the corner areas particularly sensitive. A conventional round O-ring or square-section gasket would require more compression force, while insufficient corner compression could become a weak point for water ingress.
The third challenge appeared during production assembly.
A large, irregular silicone rubber gasket is soft and difficult to keep in place. If it is placed directly into the housing groove, it can shift, lift, twist, or partially roll when operators pick up the housing or close the cover. Even if the gasket itself is molded correctly, assembly misalignment can still cause sealing failure.
The project therefore had to solve several problems at the same time:
- achieve waterproof sealing with limited housing thickness;
- reduce the compression force required from a snap-fit enclosure;
- maintain a continuous seal around corners and structural features;
- prevent the gasket from shifting during assembly;
- control silicone deformation after compression;
- make the design stable enough for repeat production rather than only prototype testing.
Our Solution
We developed a one-piece custom profile silicone rubber sealing gasket that followed the actual housing geometry instead of forcing the enclosure to accommodate a standard seal.
L-Shaped Profile to Reduce Required Compression
The gasket used an L-like asymmetric cross-section rather than a conventional round or rectangular section.
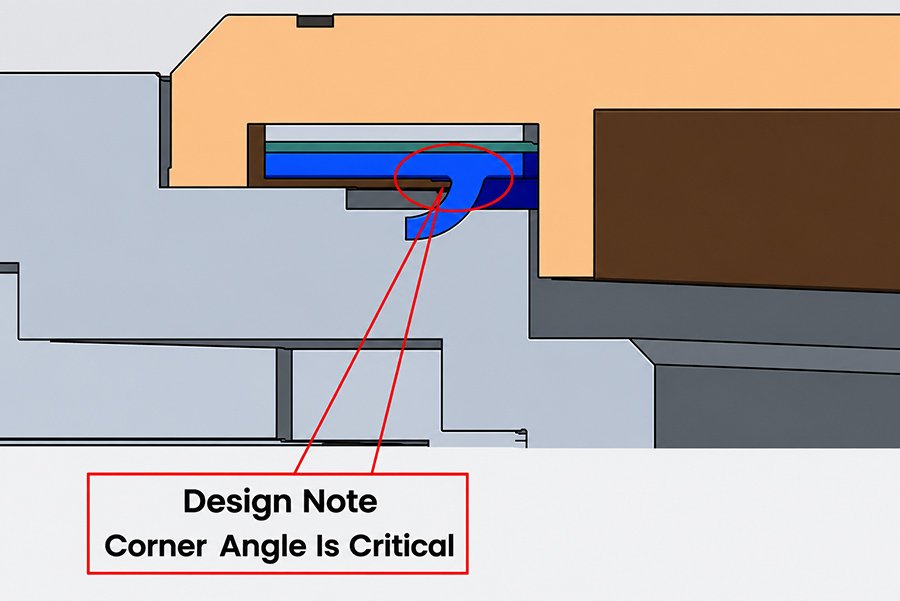
The sealing side incorporated an angled lip or skirt that contacted the main housing along a controlled sealing interface. This geometry allowed the seal to engage with less compression force than a conventional O-ring or flat gasket, which was important because the snap-fit housing could not provide high and perfectly uniform clamping pressure.
Instead of solving the waterproofing problem by simply increasing gasket thickness or compression, the sealing profile was designed to work with the available enclosure force.
Housing-Following Perimeter Design
The gasket perimeter was designed to closely follow the outer boundary of the housing.
Its geometry was adjusted around:
- enclosure corners;
- snap-fit bases;
- screw-clearance areas;
- changes in the housing outline.
The goal was to keep the sealing path continuous and uninterrupted around the entire enclosure.
Special attention was given to transition areas. Sharp profile changes were avoided and contour changes were made as smoothly as possible. This was important not only for sealing performance but also for moldability. Sharp corners in the gasket geometry can increase the risk of incomplete filling or visible weld lines during molding.
Where weld lines could not be completely avoided, their location needed to be considered during tooling so that they would not sit in the main areas exposed to sealing pressure.
PET Carrier and Adhesive for Pre-Assembly Positioning
One of the most important mass-production improvements was the gasket positioning method.
The back side of the silicone rubber gasket was combined with double-sided adhesive and a PET carrier film. The gasket could therefore be positioned on the carrier and then pre-attached to the sealing area of the main housing before the enclosure was closed.
This solved a practical assembly problem that is easy to overlook during initial product design: a soft, large-profile gasket can collapse or move before the cover is installed.
With the pre-positioning structure, the gasket was less likely to:
- shift away from the intended sealing path;
- twist or roll during handling;
- lift out of the groove;
- become trapped incorrectly when the cover was snapped into place.
The result was a sealing concept that considered not only gasket geometry, but also how the part would actually be handled on the production line.
Anti-Extrusion Groove Features
The sealing groove also incorporated retaining walls on both sides of the gasket.
When silicone is compressed, it naturally deforms laterally. Without sufficient restraint, the gasket can be pushed outward, changing the intended contact condition and potentially creating inconsistent sealing.
The side-wall structure limited excessive lateral extrusion and helped keep the gasket inside its designed sealing region after the upper housing was assembled.
The sealing lip followed the housing perimeter, while the carrier held it in position during assembly. The groove limited extrusion under compression. These features worked together to keep sealing contact consistent.
Result
The custom profile sealing solution allowed the enclosure to achieve its waterproofing requirement without increasing housing thickness or redesigning the product around a conventional deep O-ring groove. The larger version of the enclosure was designed to meet an IP67-level waterproofing requirement and was successfully transferred into mass production. According to the original project record, the design has remained in stable production and shipment for multiple years. The same design approach was also used on a smaller enclosure, approximately 80 × 35 mm, which met an IP68 requirement and likewise entered long-term mass production.